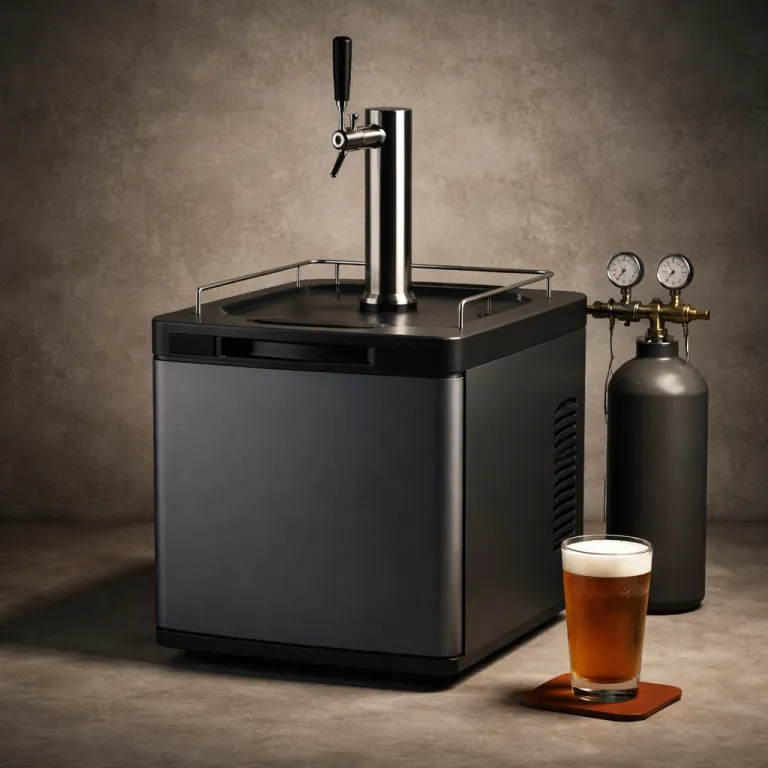
Why a kegerator changes the way you drink beer
From bottles in the fridge to a tap at your fingertips
Opening your fridge to find a tap instead of a jumble of bottles changes how you think about beer at home. A kegerator turns your kitchen, garage, or game room into a small, reliable draft bar. Instead of planning around six-packs and cans, you start planning around styles, serving temperatures, and who you want to share them with.
With a keg on tap, you pour exactly what you want, when you want it. No half-warm bottles left on the table, no guessing how long that open growler has been in the back of the fridge. Every pour is fresh, carbonated the way the brewer intended, and served at a consistent temperature.
Why draft at home feels different
Draft beer is not just about convenience. It changes the experience of tasting. You can pour smaller glasses to compare different beers side by side, or serve perfect pints for friends without constantly opening new containers. If you also brew at home, a kegerator lets you serve your own creations with the same ease as commercial beer, especially when paired with simple homebrew transfer tools that make moving beer into kegs cleaner and faster.
Saving money, space, and effort
Over time, buying beer by the keg can be more economical than stocking up on cases, especially if you have a few go-to styles you drink regularly. You also cut down on packaging waste and recycling runs. Instead of shelves full of bottles, you have one clean unit that stores, chills, and serves your beer. Later, when you look at types, sizes, and how the gas system works, you will see how easy it is to fit a kegerator into your space and routine.
Choosing the right kegerator type and size for your space
Matching keg capacity to your drinking habits
Before you fall in love with a shiny stainless box, think about how much beer you actually go through. A compact kegerator that holds a single 5-gallon keg is perfect if you mostly pour pints on weekends or share with a couple of friends. Larger units that fit multiple kegs make more sense if you host regular parties, want different styles on tap, or plan to serve both beer and a non-beer option like cider or kombucha.
Also consider keg formats. Some kegerators are designed around standard half-barrel kegs, while others are better suited to sixth-barrel or homebrew corny kegs. If you brew your own beer, check that the interior layout and couplers match the kegs you use.
Balancing footprint, height and placement
Measure the space where your kegerator will live, then measure again. You need room not only for the cabinet, but also for the draft tower height and any clearance behind for ventilation. Tall units can be awkward under low cabinets, while squat models may require you to bend more for every pour.
Think about door swing and traffic flow. A door that opens into a busy kitchen path will get annoying fast. If you plan to slide the kegerator under a counter later, choose a size and ventilation style that will still work when your setup evolves.
Single tap or multi-tap flexibility
Single-tap kegerators are simpler and usually cheaper, but a dual- or triple-tap tower gives you flexibility to rotate styles or keep a crowd-pleaser alongside something more experimental. If you are into homebrewing or plan to be, that flexibility becomes even more valuable over time.
When comparing models, look at how easy it is to upgrade the tower or add lines later. A unit that accepts standard components, like a professional siphon transfer tool for homebrew, will grow with your beer ambitions.
Gas, tank, keg coupler and draft tower : how the system really works
From gas tank to glass: what actually happens
Think of your kegerator as a pressure-controlled ecosystem. The gas tank (usually CO2, sometimes mixed with nitrogen) pushes beer out of the keg, up the draft line, and through the faucet. Pressure is set by the regulator, which sits between the tank and the keg coupler. Too much pressure and you get foamy, over-carbonated pours ; too little and the beer goes flat and sluggish.
The keg coupler is the key interface. It locks onto the keg valve, seals the system, and provides two paths : gas in, beer out. When you pull the tap handle, you are simply opening the faucet at the end of that pressurized path.
Understanding coupler types and compatibility
Not all kegs speak the same “language”. Different breweries and regions use different coupler standards (D, S, G, etc.). Most American domestic kegs use a D-system coupler, while many European imports use S-system. Before you buy, match the coupler type to the brands you actually plan to serve. Swapping couplers later is possible, but it adds cost and complexity.
Pressure, carbonation and beer style
Gas choice and pressure settings should match the beer style. Classic lagers and most ales pour well with straight CO2 at moderate pressure. Creamy stouts and some Belgian styles often benefit from a mixed-gas setup and different carbonation targets. Understanding how carbonation is created during the beer brewing process helps you fine-tune your kegerator so you are not fighting foam every time you pour.
Once you grasp how gas, tank, coupler and tower interact, the rest of your buying decisions become much easier. You will know which features are essential, which are nice-to-have, and how to avoid paying for specs that do not improve what ends up in your glass.
Indoor vs outdoor, freestanding vs built in : matching your kegerator to your life
Choosing where your kegerator will live
Before you fall in love with a shiny model, think about where it will actually sit. A kegerator that is perfect in a basement bar can be a headache on a sunny patio. Start by measuring the space, including height under counters and clearance for the door to swing fully. Remember you will need room behind the unit for ventilation and access to the gas tank.
Noise is another factor. Compressors and fans hum, and that might be fine in a garage, but less welcome in a quiet living room. If you are sensitive to sound, look for quieter models and avoid placing the unit right next to seating.
Built-in vs freestanding: what really matters
Freestanding kegerators vent heat from the back or sides. They need open air around them, so they should not be wedged tightly into cabinetry. Built-in (or undercounter) models vent from the front and are designed to slide into a cabinet cutout, similar to a dishwasher.
- Freestanding – usually cheaper, easier to move, great for renters or multipurpose spaces.
- Built-in – cleaner look, integrated into cabinetry, ideal for permanent home bars or kitchens.
Never treat a freestanding unit as built-in. Trapped heat will overwork the compressor, warm your beer, and shorten the life of the appliance.
Indoor comfort vs outdoor toughness
Indoor kegerators are designed for stable room temperatures. On a hot deck or in an uninsulated garage, they can struggle to keep beer cold and may fail prematurely. Outdoor-rated models use stronger insulation, weather-resistant components, and more powerful compressors to handle heat and humidity.
If your kegerator will live outside, choose an outdoor-rated unit and, if possible, place it in shade and under cover. For garages or three-season rooms with temperature swings, an outdoor model or a unit specifically rated for wider ambient temperatures is the safer bet.
Real world buying tips, maintenance and beer freshness
Smart shopping strategies before you hit “buy”
Before you pull the trigger on a kegerator, measure your space twice. Check height with the draft tower installed, door swing clearance, and ventilation gaps for built-in models. Then match that to the keg capacity you decided on earlier, including room for gas tanks and any future upgrades.
Read the fine print on what is included : some units ship with a basic tower and faucet, others include regulators, couplers, and even a CO2 tank. Price out what you would need to add if it is not in the box. It is often better to pay a bit more upfront for a complete, higher quality kit than to replace cheap parts later.
Simple maintenance habits that keep beer tasting right
Clean your beer lines, faucet, and coupler regularly. For most home setups, every two to three weeks of use is a good rhythm. Use a proper line-cleaning solution and follow it with a thorough rinse. Wipe down the tower and exterior so sticky spills do not attract dust and off smells.
Inside the cabinet, keep the interior dry and free of ice buildup. Defrost if you see heavy frost on the walls, and check door gaskets for a tight seal. A small open box of baking soda can help control odors.
Dialing in temperature, pressure, and keg handling
Most beers pour best when the kegerator is set a few degrees above freezing. Combine that with the right CO2 pressure for your beer style and line length to avoid foam or flat pours. Make small adjustments and give the system time to stabilize.
Always let a new keg rest and chill fully before tapping. Move kegs gently, keep them upright, and avoid shaking. When you are not pouring for a while, close the gas cylinder valve and keep the door shut as much as possible to maintain a steady environment.