Why a home brewing kit for beginners beats buying random equipment
Why starting with a complete kit actually makes sense
When you are new to brewing, it is tempting to buy equipment piece by piece. A fermenter here, a kettle there, maybe a random airlock from an online marketplace. The problem is that homebrewing is a chain of steps, and missing just one link can stall your first batch or make it far more stressful than it needs to be.
A beginner home brewing kit is built around the full process, from boiling wort to fermentation and packaging. Instead of guessing which size bucket matches which airlock or if your siphon tubing will fit the bottling wand, you get gear that is designed to work together. That means fewer leaks, fewer last‑minute hardware runs, and more focus on learning what actually matters : how ingredients and technique shape your beer.
A smoother learning curve and fewer expensive mistakes
Buying random equipment often leads to duplication. You might grab a small kettle, then realise you cannot safely boil a full batch and need to upgrade. Or you buy a fermenter that is hard to clean, which increases the risk of infection and off‑flavours. A well‑chosen kit is sized for typical beginner batch volumes and comes with cleaning and sanitising tools that protect your beer from day one.
Because everything is standardised, it is also easier to follow beginner recipes and brewing guides. You can focus on understanding how your fermenter, airlock, and siphon fit into the broader world of fermentation vessels and beer tanks, rather than wrestling with incompatible parts. Later, when you start exploring different batch sizes, new recipes, and more advanced techniques, you will have a solid, frustration‑free foundation to build on instead of a drawer full of mismatched gear.
What a good beginner brewing kit actually includes
The core pieces every beginner kit should include
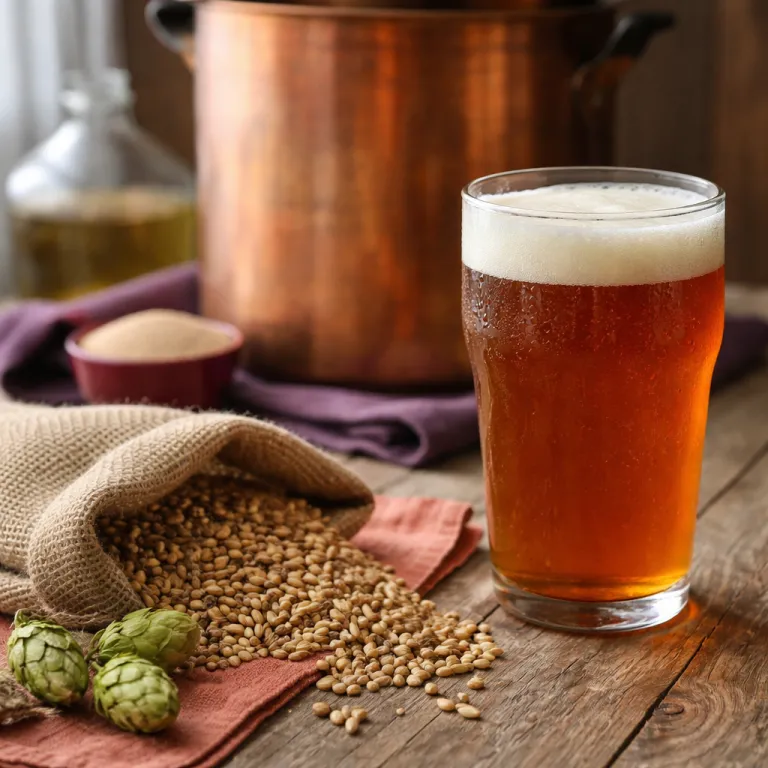
A solid home brewing kit for beginners focuses on the essentials you actually need to make good beer, not on shiny extras. At minimum, you should expect:
- Fermenter with airlock – A food-grade bucket or carboy where the wort becomes beer. The airlock lets CO₂ escape while keeping oxygen and microbes out.
- Bottling bucket with spigot – Separate from the fermenter, this makes packaging easier and reduces the risk of stirring up sediment.
- Racking cane and tubing – For transferring beer between vessels without splashing and oxidizing it.
- Hydrometer (or refractometer) – Measures gravity so you can estimate alcohol content and confirm fermentation is finished.
- Thermometer – Fermentation temperature control is crucial for clean flavors.
- Sanitizer – No-rinse sanitizer is non‑negotiable ; clean gear makes better beer than any fancy gadget.
- Bottle filler, capper, and caps – Everything you need to package your finished beer safely.
- Ingredient kit – Pre-measured malt extract, hops, yeast, and instructions tailored to your batch size.
Helpful extras that are worth having
Some kits add a few genuinely useful upgrades. These are not mandatory, but they make your first brew day smoother:
- Auto-siphon – Easier and more reliable than starting a manual siphon.
- Stick-on fermenter thermometer – Lets you monitor temperature at a glance.
- Long-handled spoon or paddle – For stirring wort and mixing in priming sugar.
What you will not usually find in the box is the kettle and heat source, which you will match to your chosen batch size and recipe. As you get more comfortable, you can branch out into styles like kettle sour beer and refine your equipment around the beers you love most.
Choosing the right batch size and recipe for your first homebrew
Picking a batch size that actually fits your life
Most beginner kits come in two main batch sizes : around 1 gallon (about 4 liters) and 5 gallons (about 19 liters). Both can make great beer, but they suit very different situations.
Small batch kits (around 1 gallon) are ideal if :
- You live in a small apartment or have limited storage
- You are not sure you will enjoy brewing yet
- You want to experiment with different styles often
- You do not want to be stuck with a large amount of a beer you might not love
Standard batch kits (around 5 gallons) make more sense if :
- You already know you enjoy craft beer and want plenty to share
- You have enough space for a larger fermenter and bottles
- You are fine spending a bit more time on brew day and bottling
- You prefer better value per bottle over maximum flexibility
Choosing a first recipe that sets you up for success
Your first brew should be simple, forgiving, and tasty. A good beginner kit recipe usually :
- Uses malt extract instead of all-grain to reduce complexity
- Has moderate alcohol content (around 4–6 %)
- Does not rely on delicate hop aromas that can be lost easily
- Comes with clear, step-by-step instructions matched to the equipment
Classic first recipes include pale ale, amber ale, brown ale, and simple wheat beers. These styles hide small mistakes better than very light lagers or extremely hoppy IPAs.
When you look at beginner kits, check that the included recipe matches the batch size and gear, and that it leads smoothly into later steps like bottling and serving. Many kits also explain how to pour your finished beer properly, and you can go further by reading guides on how to pour perfect beer without a foamy mess once you are ready to serve your homebrew.
From kettle to bottle : how a homebrew starter kit fits the brewing steps
Unpacking how your kit guides each brewing step
A good beginner kit is built around the actual brewing process, not the other way around. Every piece of gear should have a clear job from the moment you heat water to the day you open your first bottle.
From heating water to boiling your wort
You start with your kettle or fermenter-kettle combo. This is where you steep specialty grains (if your recipe uses them) and dissolve your malt extract. The kit’s thermometer helps you keep steeping temperatures in the right range, while a sturdy spoon or paddle lets you stir without scratching or melting anything.
Once you reach a rolling boil, the same vessel becomes your wort boiler. The kit’s hop additions, usually pre-measured, go in according to the recipe sheet, which keeps timing simple and repeatable.
Cooling, transferring, and fermenting
After the boil, your goal is to cool the wort quickly and cleanly. Some starter kits include an immersion chiller; others rely on an ice bath in your sink. Either way, the kit’s thermometer and sanitized siphon or spigot help you move cooled wort into the fermenter without dragging in oxygen or contaminants.
The fermenter (bucket or carboy) is matched with an airlock and stopper, so you can seal the beer and let yeast work in a controlled environment. The hydrometer from your kit lets you check gravity before and after fermentation to track progress and estimate alcohol content.
Packaging your finished beer
When fermentation is done, the bottling bucket, bottling wand, and caps all come into play. Priming sugar is portioned for your batch size, so carbonation is predictable. The same focus on fit and function that shaped the earlier equipment now makes bottling day straightforward instead of stressful.
How to pick a reliable home brewing kit for beginners and enjoy homebrew long term
Key signs of a trustworthy starter kit
When you are ready to buy, start by looking at who actually makes or curates the kit. Reputable homebrew shops and established brewing brands usually provide clearer instructions, better components, and real support if something goes wrong. Avoid anonymous marketplace bundles that throw in lots of cheap gadgets but skip core items like a decent fermenter or a reliable hydrometer.
Check that the kit’s equipment list matches the brewing process you have learned about so far. You should see a clear path from boiling to cooling, fermenting, transferring, and packaging. If the kit relies heavily on single-use plastic or gimmicky tools instead of solid basics (kettle, fermenter, siphon or bottling wand, sanitizer), that is a red flag.
Balancing budget, upgrades, and durability
Think of your first kit as a foundation, not a one-off purchase. Stainless steel kettles, food-grade buckets or carboys, and quality tubing will last through many batches. It is usually better to spend a little more on durable gear than to replace flimsy items after your first or second brew.
Look for kits that are “upgrade friendly” : standard-sized fittings, common airlock types, and widely available replacement parts. This makes it easy to add a wort chiller, better thermometer, or even move to all-grain brewing later without starting from scratch.
Support, instructions, and community
A good beginner kit comes with clear, step-by-step instructions that match the brewing stages you already know. Bonus points if the manufacturer offers online videos, troubleshooting guides, or responsive customer service.
Finally, read recent reviews from actual beginners. Pay attention to comments about missing pieces, confusing directions, or poor packaging. When many new brewers say a kit helped them brew a clean, drinkable first batch, that is a strong sign you will enjoy your homebrew journey long term.