Why the right tap for your kegerator changes the taste of your beer
How your tap shapes every pour
When you pull the handle on your kegerator, the tap is the last thing your beer touches before it hits the glass. That final contact point has a huge impact on how your beer looks, smells, and tastes. A great keg, a perfectly tuned regulator, and a cold fridge can all be ruined by a poor-quality or badly adjusted tap.
The tap controls three key elements of your pour :
- Foam level – Too much foam and you lose aroma and carbonation ; too little and your beer feels flat.
- Carbonation perception – The way beer leaves the faucet affects how bubbles form in the glass, changing mouthfeel.
- Aroma release – A smooth, controlled pour helps release hop and malt aromas without beating the beer up.
Even with the right serving temperature and pressure, the wrong tap can give you gushing foam, inconsistent pours, or dull-tasting beer. That is why choosing the right style and material of tap will matter just as much as the keg you put in your kegerator.
Temperature, flow, and foam : a delicate balance
Temperature and flow rate are tightly linked to tap performance. If the faucet or beer line near the tap is warmer than the keg, the first pour will often be mostly foam. A well-matched tap helps you manage this balance, especially when you later look at towers and multi-tap setups.
Key ways the tap influences this balance :
- Flow control – Some taps include built-in flow control, letting you fine-tune how fast beer leaves the faucet. This is especially useful if you serve different beer styles from the same kegerator.
- Internal design – The shape and length of the faucet interior can either calm the beer or agitate it, changing foam and mouthfeel.
- Thermal mass – Heavier, metal taps can hold temperature better between pours, reducing the “first pint foam” problem.
Of course, tap choice is only one part of the equation. Keeping your keg and lines at a stable serving temperature is just as important. If you want to go deeper into that side of things, you can read more about keeping your keg cold in the fridge for fresh draft beer, which pairs perfectly with a well-chosen tap.
Cleanliness and materials : protecting flavor at the faucet
The tap is also a critical hygiene point. Beer stone, yeast, and sugar residues can build up quickly inside a faucet, especially if it is not designed for easy cleaning. That buildup does not just look bad ; it can introduce off-flavors and even contamination.
Different tap materials and designs will be covered in more detail later, but even at this stage it is useful to know how they affect taste :
- Stainless steel taps – Resist corrosion and are less likely to react with beer, helping preserve delicate flavors.
- Chrome-plated brass taps – Common and affordable, but if the plating wears, exposed brass can affect flavor over time.
- Forward-sealing designs – Keep beer from drying inside the faucet, reducing sticking and bacterial growth.
A clean, well-designed tap keeps each style tasting as the brewer intended, whether you are pouring a crisp lager, a hop-forward IPA, or a rich stout. When you start comparing tap kits and full kegerator conversions later on, this flavor protection is one of the most important factors to keep in mind.
Matching the tap to your favorite beer styles
Not every beer pours best from the same type of tap. High-carbonation wheat beers, nitro stouts, and heavily dry-hopped IPAs all behave differently under pressure. The right tap helps you bring out the best in each style.
For example :
- Highly carbonated beers – Benefit from taps that allow precise flow control to avoid over-foaming.
- Nitro beers – Need a special stout or nitro faucet with a restrictor plate to create that creamy cascade.
- Aroma-driven beers – Pour better from taps that give a smooth, controlled flow, preserving hop and yeast character.
As you explore different tap types, towers, and full kits later on, keep your go-to beer styles in mind. The tap you choose should match not only your kegerator setup, but also the way you like to drink your beer at home.
Main types of taps, towers and kits for a home kegerator
Understanding the main tap options
When you start planning your home kegerator, the tap is usually the first thing you picture. But there is more than one way to get beer from keg to glass. The main options you will run into are :
- Standard faucet on a shank (mounted through a fridge door or wall)
- Draft tower (single or multiple faucets on a column)
- Complete kegerator kits (tap + lines + regulator + hardware)
Each solution has its own pros and cons in terms of installation, maintenance and how flexible your setup will be when you want to upgrade later.
Single faucet vs multi faucet setups
The first big choice is how many taps you want. A single faucet is simple, cheaper and perfect if you usually keep only one keg at home. It is also easier to install in a converted fridge or small kegerator.
Multi faucet setups, often built on a tower, let you :
- Serve different beer styles at the same time
- Keep one line for beer and another for cider or soda
- Experiment with different carbonation levels
They do require more space inside the fridge for extra kegs and gas lines, and you will spend more time cleaning several faucets and beer lines. If you think you will eventually move to a multi tap kegerator, it can be smart to plan for that now so you do not have to redo everything later.
Door mounted taps and shanks
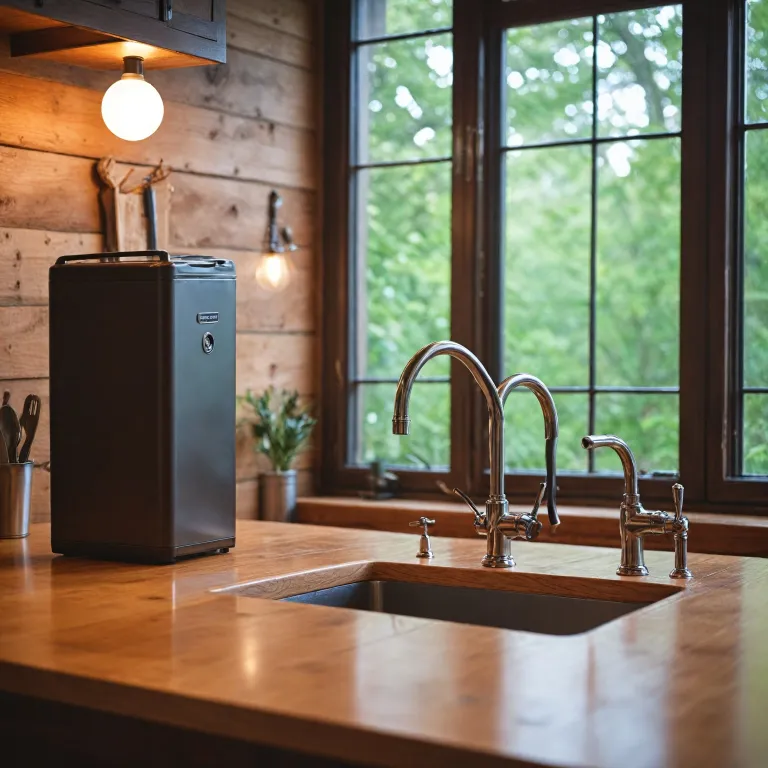
For many home brewers and beer fans, the easiest option is a faucet mounted directly through the fridge or kegerator door. This uses a metal tube called a shank that passes through the wall, with the faucet on the outside and the beer line connected on the inside.
Door mounted taps are popular because they :
- Are relatively easy to install with basic tools
- Keep the beer line short, which helps reduce foaming
- Work well for one or two taps without taking much space
The main limitation is aesthetics and flexibility. If you later want three or four taps, the door can start to look crowded, and you will need to drill more holes. Also, you must be careful not to hit coolant lines when drilling, especially on modern fridges.
Draft towers for a bar style look
If you want your home kegerator to look like a mini bar, a draft tower is usually the way to go. A tower is a vertical column that mounts on top of the fridge or kegerator cabinet, with one or more faucets coming out of it.
Draft towers offer several advantages :
- Clean, professional look that feels like a pub tap system
- Easy expansion from one to two or three faucets on the same tower
- Comfortable pouring height above the top of the fridge
The main challenge with towers is keeping the beer lines inside the tower cold enough, especially if your kegerator is in a warm room. Warm lines can cause the first pour to be foamy. Many people add tower cooling fans or insulation to help with this, which connects directly with how you manage temperature and foam in the rest of your setup.
Choosing between basic parts and full kegerator kits
When you start shopping, you will see individual components (faucets, shanks, towers, regulators) and also complete kits that bundle everything together. For many home users, a kegerator kit for home draft beer is the most straightforward option, especially for a first build.
A good kit usually includes :
- One or more faucets and shanks or a tower
- Beer lines and gas lines with the right fittings
- A CO₂ regulator and sometimes the gas cylinder
- Clamps, gaskets and mounting hardware
Buying a kit reduces the risk of missing a small but essential part, and it helps ensure that all components are compatible. On the other hand, if you already have some pieces or want very specific materials and brands, building your system from separate parts can give you more control and make future upgrades easier.
Specialty taps and features to consider
Beyond the standard faucet, there are a few specialty options that might fit your style of beer drinking :
- Flow control faucets let you adjust resistance at the tap, useful for highly carbonated beers or when line length is not ideal.
- Stout or nitro faucets use a restrictor plate to create that creamy, cascading pour for stouts and some ales.
- Interchangeable tap handles make it easy to label what is on each line and add a personal touch to your setup.
These options connect directly to how you want your beer to pour and feel in the glass, and they work best when matched with the right gas, pressure and temperature settings you will fine tune in the rest of your kegerator build.
How materials, price and shipping offers affect your tap choice
Choosing between stainless steel, brass and plastic
The material of your tap is not just a cosmetic choice ; it affects flavor, durability and how much cleaning work you will have to do.
- Stainless steel – The gold standard for most home setups. It is corrosion resistant, does not react with beer, and is easy to sanitize. If you are serious about flavor consistency and plan to pour a wide range of styles, stainless steel is usually worth the extra cost.
- Chrome‑plated brass – Often cheaper and shiny out of the box, but the chrome layer can wear off over time. When brass is exposed, it can slightly affect taste and is harder to keep perfectly clean. It is fine for occasional use, but less ideal if you pour daily or keep beer on tap for long periods.
- Plastic – Lightweight and inexpensive, common in picnic taps and some entry‑level kits. Plastic can scratch more easily, which gives bacteria places to hide. It is acceptable for short‑term or portable use, but not the best choice for a permanent kegerator build.
If you are already paying attention to line length, temperature and carbonation, upgrading to stainless steel taps keeps your setup in line with the quality goals you have for your beer.
Forward‑sealing vs rear‑sealing : why it matters
Beyond the metal itself, the internal design of the faucet changes how your beer pours and how often you need to clean or unstick the tap.
- Rear‑sealing faucets – The traditional design. The valve sits toward the back of the faucet body, so a small amount of beer remains inside after each pour. If you do not pour every day, that beer can dry and make the handle hard to pull, or even cause off flavors if you do not clean regularly. They are usually cheaper and widely available.
- Forward‑sealing faucets – The valve is closer to the spout, so less beer is trapped inside. This design helps prevent sticking and reduces the risk of stale beer affecting the next pour. Forward‑sealing taps often cost more, but many home users find the smoother, more reliable pour worth the price.
If you only tap a keg for parties, a basic rear‑sealing faucet may be enough. If your kegerator is always on and you pour a pint most evenings, a forward‑sealing stainless steel faucet is usually the most practical long‑term choice.
Balancing price with how often you pour
When you look at taps, towers and full kits, prices can range from budget to premium. The key is to match your investment to how you actually use your kegerator.
- Occasional use – If you only tap a keg for special events, a mid‑range chrome‑plated brass faucet or a simple single‑tap tower kit can be perfectly adequate. You will spend less upfront, and the lighter use means wear and tear is slower.
- Regular home bar use – If your kegerator is part of a home bar and you pour several times a week, it is usually smarter to spend more on stainless steel, forward‑sealing faucets and quality shanks and lines. You will get fewer issues with sticking, foaming and off flavors.
- Enthusiast or multi‑tap setups – For multi‑tap conversions and long‑term use, premium components pay off. The cost per tap is higher, but you reduce maintenance headaches and protect the quality of every keg you connect.
Remember that the tap is only one part of the system. Cheap lines, poor insulation or inconsistent temperature can undo the benefits of a high‑end faucet, so think of your budget in terms of the whole draft system, not just the visible parts.
How shipping, bundles and hidden costs affect your budget
Two taps that look similarly priced can end up costing very different amounts once you factor in shipping and what is (or is not) included in the box.
- Check what is included – Some listings show a tap at a great price, but you still need to buy the shank, beer line, clamps, tower insulation or drip tray separately. Complete kits may look more expensive, yet be cheaper than piecing everything together.
- Shipping and returns – Heavy metal parts like towers and shanks can increase shipping costs. Free or flat‑rate shipping can make a higher sticker price more attractive overall. Also check return policies in case the tap does not fit your fridge or tower as planned.
- Future upgrades – If you think you might add more taps later, it can be cheaper to buy a multi‑tap tower or compatible components now instead of replacing everything later.
It is often worth comparing a few complete kits to the cost of buying each part separately. That way you can see whether a slightly higher initial price actually saves money once you include all the pieces you need.
Considering temperature control and long‑term freshness
Even the best tap will not fix problems caused by poor temperature control. Warm beer lines, towers without insulation and inconsistent fridge temperatures all lead to foamy pours and dull flavors.
When you compare taps and towers, look for options that help keep the beer cold all the way from keg to glass. Insulated towers, tower cooling fans and proper line routing inside the fridge make a big difference to how your beer tastes over time. For more detail on keeping your draft system stable, you can read these tips for fresh draft beer at home.
Thinking about materials, price and shipping in the context of your whole kegerator setup will help you choose a tap that fits both your budget and your expectations for flavor and reliability.
Real life setups : from first keg to multi tap kegerator conversion
Starting with a single tap at home
Most home setups begin with a simple, single-faucet tower on top of a compact kegerator. If you are just moving from bottles and cans to draft, this is usually the most budget-friendly and least intimidating option.
In this kind of setup, the tap choice is mainly about reliability and ease of use. A basic chrome-plated or stainless steel faucet, a standard tower, and a single line of beer tubing are enough to pour fresh pints. The key is to match your tap to the keg style you plan to use most often and to set your CO2 pressure correctly so the beer flows smoothly.
At this stage, many people realize how much the tap itself influences foam, aroma, and mouthfeel, especially when they compare the same beer from the bottle and from the keg. That is usually when they start thinking about upgrades.
Upgrading to dual taps for variety
Once you are comfortable pouring at home, a common next step is converting a single-tap kegerator into a dual-tap system. This lets you serve two beers at once, for example a lager and an IPA, or a house favorite and a seasonal guest keg.
- New tower or shanks : you can either replace the tower with a dual-faucet tower or drill the door/side of a fridge and add a second shank and faucet.
- Gas management : a dual-output regulator or a gas manifold allows you to feed both kegs from one CO2 tank.
- Tap style : many people upgrade to forward-sealing faucets at this point, because they are easier to keep clean and less prone to sticking between sessions.
This is where the balance between budget, materials, and performance really starts to matter. Stainless steel faucets and shanks cost more, but they handle different beer styles better and are more resistant to off-flavors over time.
Building a multi-tap kegerator or keezer
For serious home enthusiasts, the ultimate project is a multi-tap kegerator or a chest-freezer conversion (often called a keezer). These builds can range from three taps to six or more, and they are ideal if you like to rotate styles, serve homebrew, or host regular tastings.
Typical elements of a multi-tap build include :
- Collar or tap wall : a wooden collar on a chest freezer, or a reinforced panel on a fridge, to hold multiple shanks and faucets.
- Insulated beer lines : longer lines routed carefully to control flow rate and reduce foaming.
- Gas distribution : a manifold or bank of secondary regulators so you can run different pressures for different beers.
- Matching taps to styles : for example, a stout faucet with a restrictor plate for nitrogenated beers, and standard faucets for lagers and ales.
At this level, the lessons about temperature control, line length, and tap materials all come together. A well-planned multi-tap system can pour consistently great beer, but only if the hardware is chosen to match how you actually drink and serve.
Real-world examples of tap choices
To make these setups more concrete, here are a few common profiles and how their tap decisions play out :
- The casual weeknight drinker : one stainless steel forward-sealing faucet on a compact kegerator, serving a single favorite style. Prioritizes low maintenance and clean flavor.
- The variety lover : dual-tap tower on a mid-size kegerator, with separate lines for a light beer and a rotating craft option. Uses a gas manifold and pays attention to pressure settings to keep both beers pouring well.
- The homebrew host : four or more taps on a keezer, mixing commercial kegs and homebrew. Invests in quality shanks, faucets, and regulators to avoid leaks and off-flavors, and chooses tap styles to match specific beer types.
Each of these setups shows how the same basic principles apply : the right tap, matched to your keg, pressure, and temperature, will make your beer taste better and your pouring experience smoother.
Planning your own upgrade path
When you look at these real-life configurations, it becomes easier to plan your own path. Start by asking how many beers you truly want on tap at once, how often you entertain, and how much time you are willing to spend on cleaning and maintenance.
If you are just starting out, a solid single-tap system with a good-quality faucet may be all you need. If you already know you love variety, it can be smarter to invest in a tower or collar that supports more taps from the beginning, even if you only install one or two faucets at first.
From there, you can gradually add taps, upgrade materials, and fine-tune your gas and line setup. The goal is not to build the biggest system, but to choose taps and hardware that match the way you actually enjoy beer at home.
Practical checklist for buying a tap for your kegerator
Quick questions before you buy
- What beers do you pour most often ?
Lagers, IPAs, stouts or mixed styles – this affects whether you need a standard faucet, a stout faucet or even multiple taps. - How many kegs do you want on tap at once ?
One simple line, or are you already thinking about a future multi tap setup like the examples mentioned earlier ? Plan for expansion now. - Where will the kegerator live ?
Kitchen, garage, balcony or basement – temperature swings and available space will influence tower height, shank length and insulation needs. - Who will use it ?
Just you, or guests and family too ? If many people pour, prioritize easy operation and drip tray capacity to avoid mess.
Technical specs to confirm
- Compatibility with your keg coupler and lines
Make sure the shank diameter and thread type match your existing or planned beer lines and coupler from your first setup. - Number of faucets and tower style
Single, double or triple faucet tower ; straight or T shaped ; wall mounted or top mounted – align this with your long term layout ideas. - Flow control or standard faucet
Decide whether you want built in flow control to handle different carbonation levels, or if you are fine tuning pressure only at the regulator. - Shank length and insulation
Check that the shank is long enough for your fridge or kegerator wall thickness, and that you can insulate the beer line properly to limit foaming. - CO₂ and pressure setup
Confirm that your regulator, gas lines and manifold (if using multiple taps) match the number of kegs you plan to run.
Materials, hygiene and durability
- Faucet and shank material
Choose stainless steel if you want maximum resistance to corrosion and off flavors, especially if you pour acidic or highly hopped beers. - Interior contact surfaces
Check that all beer contact parts – faucet body, shank, tailpieces – are made from food grade materials that will not react with your beer. - Ease of cleaning
Look for faucets that disassemble easily, and consider whether you want a forward sealing design to reduce sticking and bacterial buildup. - Drip tray and splash control
Decide if you need a removable drip tray, drainable tray or simple fixed tray, depending on how often you pour and clean.
Budget, value and future upgrades
- Total cost, not just the faucet
Add up faucet, tower, shank, lines, coupler, regulator, CO₂ tank and any conversion kit parts – compare this with your initial budget. - Balance between price and performance
Use what you learned about tap types and real life setups to decide where to spend more (faucet and lines) and where you can save. - Room for expansion
If you think you will upgrade to a multi tap kegerator, consider buying a tower or kit that can accept extra faucets later. - Warranty and spare parts
Check availability of replacement seals, springs and handles, and whether the brand offers a clear warranty for home use.
Final pre purchase checklist
- You know which beer styles you will serve most often.
- You have chosen the number of taps you need now, with a plan for possible expansion.
- Your faucet, shank and tower are compatible with your fridge or kegerator body.
- All beer contact parts are food grade and preferably stainless steel.
- You have a clear cleaning routine in mind and the tap design supports it.
- Your gas system (regulator, lines, manifold) matches your tap count.
- The total cost fits your budget, including any conversion or installation parts.
- You have checked reviews or user feedback for reliability and ease of use.